Remove V9 virus. V9.com portal removal for Chrome, Firefox and IE

The trouble of inherently user-dependent web browsing settings getting hijacked by the V9 adware is broken down into details in this guide. The respective specifics that can be learned from the article include the direct and collateral harm that this virus impairs to an infected computer, as well as the most probable system entrance mode employed, and extensively tested V9.com removal techniques.
As the cyber realm gives birth to enormous opportunities for self-implementation in its various forms as well as financial success, some wannabes stick to fast and easy ways of attaining mercantile objectives – it’s too bad this may be done at the expense of other people’s peace of mind. Taking an expert look at the V9 browser infection, it appears to be both typical as an adware program and non-trivial at the same time. The typicality consists in the distribution tactics and the consequences for the target operating system. It usually spreads as part of install packages for other software and hardly ever poses as itself for users to knowingly download the corresponding file.
In terms of the effects upon a computer, V9 circumvents the normal authorization procedure while going ahead and replacing web browser defaults. The distorted preferences include URLs for the homepage and for the search service that the victim is willing to use. In particular, the former value automatically switches over to v9.com or en.v9.com, and the latter gets substituted with search.v9.com.
The fairly non-standard features of this browser hijacker are its long-term activity (it’s been around for over a year and stays afloat as of now) and an unordinary set of landing pages being linked to. For instance, affected users may get rerouted over to safe.v9.com along with the above-mentioned pages, and this one points to a legitimate and irreproachably reputable engine when a keyword or set of keywords are entered. In the meantime, the search.v9.com domain name remains unaltered throughout the information lookup process. This is obviously an intricate marketing approach based on a diversified network of landing pages. Either way, though, the profit sources for creators of this adware are identical: the ads placed on those sites, and the web traffic provision to third-party businesses.
All of the highlighted symptoms are to be addressed in a fashion other than just closing the wrong browser tabs and typing in the right web addresses instead, because this will have you stuck in the recurrent loop. The V9 virus is something that must by all means be removed from the PC it’s on, period. Although it typically adds an easy-to-find extension to all browsers installed, its deletion implies more than simply clicking that X button or trash bin icon due to the persistent nature of the pest. The high success rate of the cleanup process outlined below is the best incentive to follow the instructions step by step.
Table of Contents
V9 adware automatic removal
The extermination of V9 adware can be efficiently accomplished with reliable security software. Sticking to the automatic cleanup technique ensures that all components of the infection get thoroughly wiped out from your system.
1. Download recommended security utility and get your PC checked for malicious objects by selecting the Start Computer Scan option
2. The scan will come up with a list of detected items. Click Fix Threats to get the adware removed from your system. Completing this phase of the cleanup process is most likely to lead to complete eradication of the infection. However, it might be a good idea to consider ascertaining the adware is gone for good.
Remove V9 adware using Control Panel
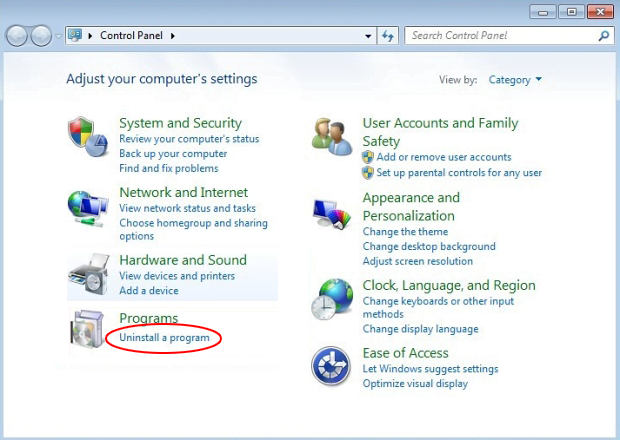
- Open Control Panel. On Windows XP / Windows 8, go to Add or Remove Programs. If your OS is Windows Vista / Windows 7 / Windows 10, choose Uninstall a program

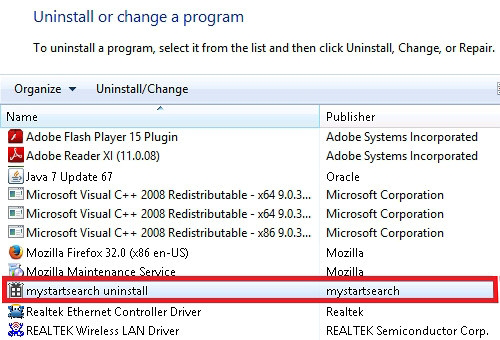
- Look down the list and locate an app that appears fishy. Click the Uninstall/Change (Change/Remove) option to get the intruder removed if spotted

Remove V9 from Firefox
- In order to restore your correct Firefox preferences, type about:config in the browser’s address field and press Enter
- Confirm that you would like to proceed by clicking on “I’ll be careful, I promise!” button on the alert that pops up

- In the field called Search, type V9
- Firefox will display all preferences related to V9 adware. Be sure to right-click on each item and select the Reset option

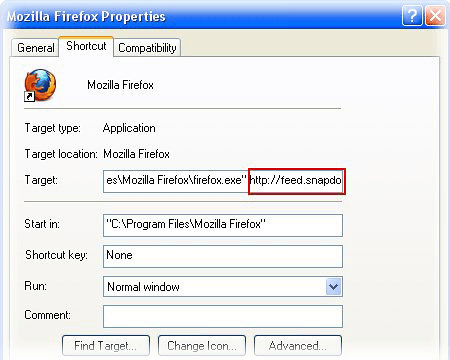
- Since Firefox shortcut parameters gets affected by this infection as well, right-click on the shortcut and choose Properties. Then proceed to the Shortcut tab and delete V9 from the Target field. Save the changes

Remove V9 from Internet Explorer
1. Get rid of the V9 adware
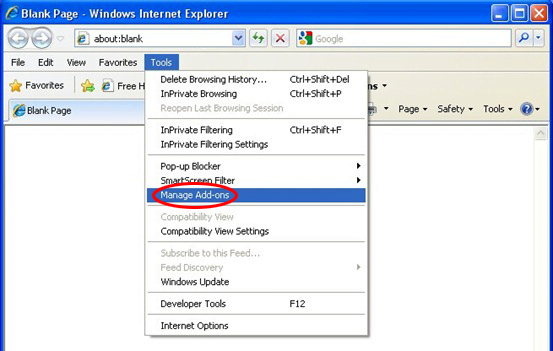
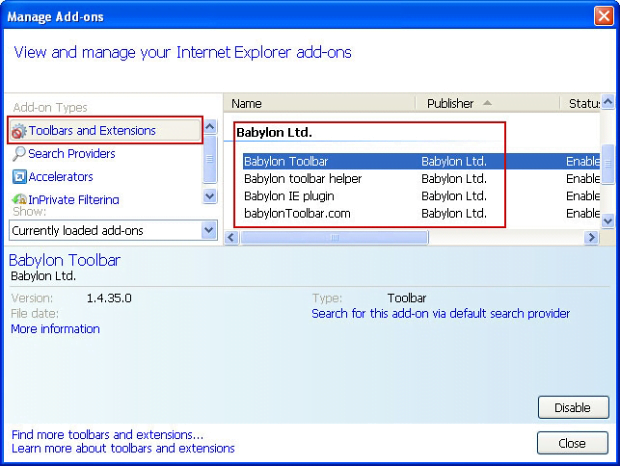
- Select Tools and click Manage Add-ons

- Proceed to Toolbars and Extensions, find all entries associated with V9. Go ahead and disable them

2. Get the search engines list back to normal
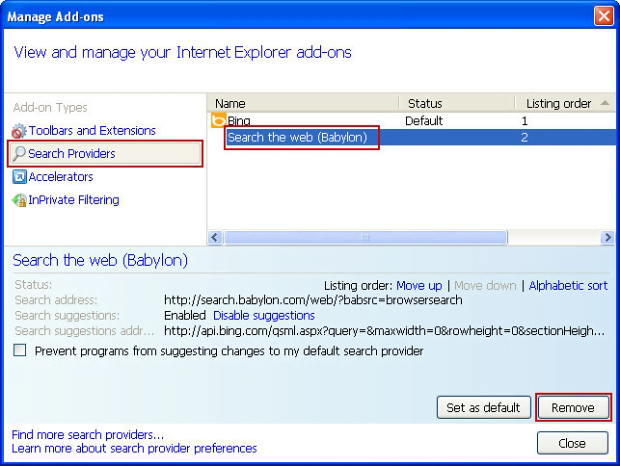
- Go to Tools menu and select Manage Add-ons
- Click Search Providers
- Highlight the item corresponding to V9 adware and hit the Remove button

3. Set the right homepage
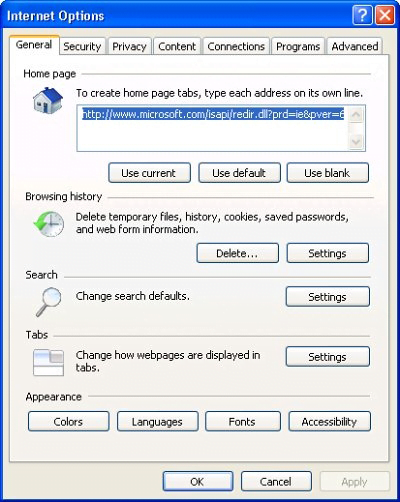
- Go to Tools and select Internet Options
- Proceed to the General tab
- Click Use default or type the correct URL in the box

Reset Google Chrome
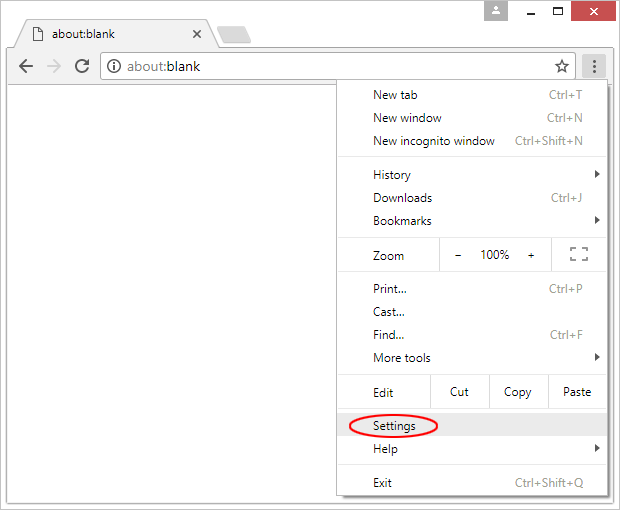
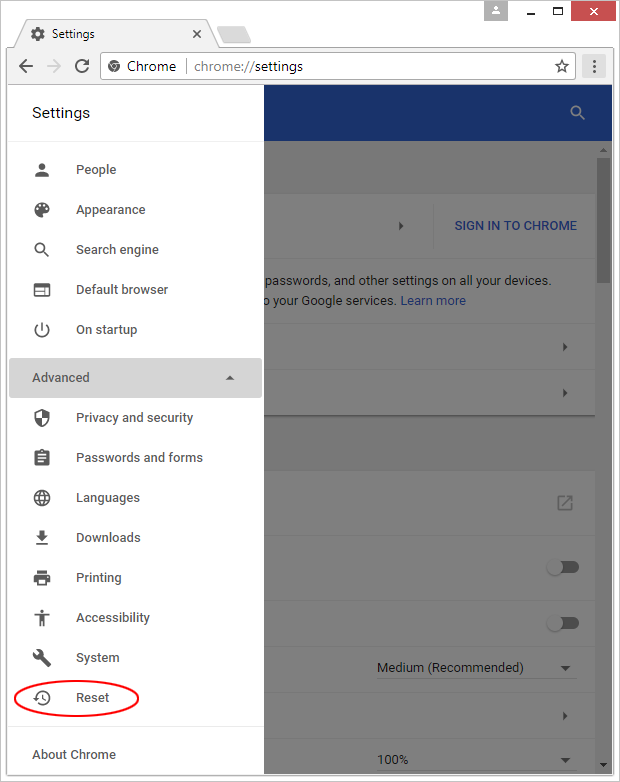
- Click on the Chrome menu icon and select Settings

- Locate the Advanced option under Settings and click on it to expand the menu. Then, pick the Reset button at the bottom

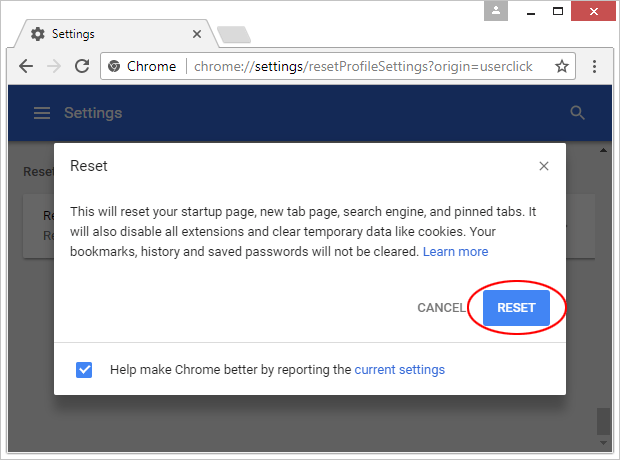
- When a new screen appears, hit Reset once again

- Chrome will now display a confirmation dialog box listing the types of data that will be lost if you proceed. Read the message carefully and, if you’re sure, click Reset

Verify whether V9 adware has been completely removed
For certainty’s sake, it’s advised to repeatedly run a scan with the automatic security software in order to make sure no harmful remnants of this adware are left inside Windows Registry and other operating system locations.
Posted in: KnowledgeBase
Leave a Comment (0) ↓

